🎧 English Audio Overview (Podcast)
Audio Overview hosted by Zundamon & Kasukabe Tsumugi (Lumina AI).
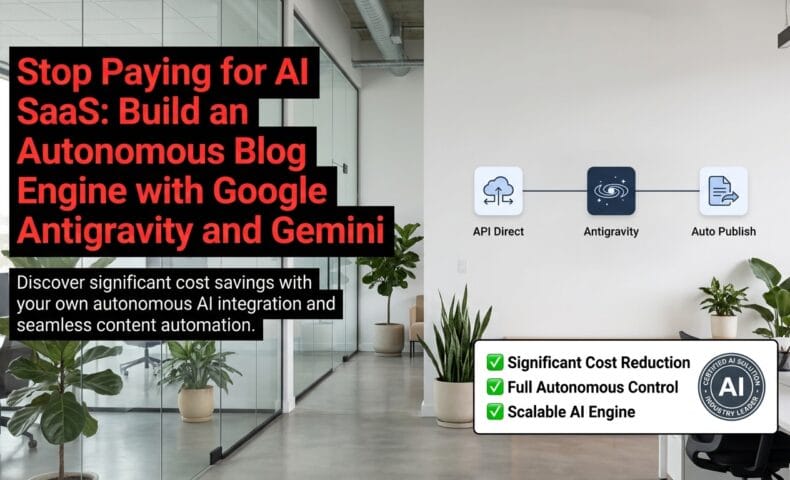
Introduction: Why an Autonomous AI Blog Powered by “Google Antigravity x Gemini” is the Only Way Forward
Key Takeaway: An autonomous architecture pairing direct Gemini API control with Google Antigravity is the only viable path to eliminate costly SaaS middleman markups while immunizing content against Google’s mass-AI de-indexing penalties.
- SaaS & Copy-Paste Obsolescence: Manual copy-pasting and generic third-party wrappers trigger immediate search penalties and unsustainable subscription drain.
- Direct API Architecture: Bypassing middleman SaaS tools cuts operational costs while granting full algorithmic control over generation pipelines.
- Autonomous Gen-3 Blogging: End-to-end autonomous reasoning handles generation, auto-posting, and dynamic GEO defense natively without human bottlenecks.
If you are still burning thousands of dollars a year on third-party AI writing tools just to manually copy-paste mediocre, generic text into WordPress, your architecture is fundamentally obsolete.
Since the dawn of ChatGPT, “mass-produced copy-paste sites” generated with lazy, low-effort prompts have been completely wiped out by Google’s relentless core algorithm updates. Search engine crawlers instantly flag low-quality AI content, handing down cold, unforgiving penalties like index removal or domain-wide de-indexing.
Today, web publishers face a double whammy: “subscription fatigue” from SaaS platforms taking massive markups on API calls, and increasingly strict search engine penalties. Pumping out thin, soulless articles does nothing but waste server resources and tank your domain authority.
What we need now is a complete paradigm shift: moving from passive consumers trapped in black-box SaaS subscriptions to “developers and true media owners” who control their own APIs and architecture. By integrating Google’s next-gen development environment Google Antigravity with Gemini—which boasts an unmatched context window, low latency, and disruptive pricing—even non-engineers can build a fully autonomous blog engine from scratch.
To start automating your content pipeline, choose your entry point from these two core architectural approaches:
- 【Philosophy and Cost-First (Difficulty: ★☆☆)】
Cut out the middleman and pivot to an ultra-low-cost operation by hitting APIs directly. The blueprint for this is detailed in Ditch Your AI Subscriptions: Building an Autonomous Blog Engine with Antigravity. Start here to understand the logical necessity of escaping the SaaS subscription trap. - 【Tech Stack and Environment-First (Difficulty: ★★☆)】
To understand why the synergy between Antigravity and Gemini beats traditional IDEs and models, explore the development roadmap in Zero-Gravity Development: The Antigravity 2.0 and Gemini 3.5 Roadmap.
🗺️ Roadmap Index (Jump To Navigation)
In this pillar guide, we lay bare the entire process of building “Lumina AI”—our autonomous AI blog system—from system design and prompt engineering to SEO defense and complete automation. Jump directly to any phase below:
- 📍 Phase 1: Tool Selection and Writing the PRD (Product Requirements Document) (Spec-driven development for non-engineers)
- 📍 Phase 2: Implementing the Core Architecture (Streamlit x WordPress REST API x Cost Optimization)
- 📍 Phase 3: Prompt Alchemy and Persona Control (Injecting humanity and expertise via parameter-driven emotion control)
- 📍 Phase 4: Next-Gen SEO and Defensive Design (Search Grounding x Schema Markup x Instant Indexing)
- 📍 Summary: Winning the Indie Dev and Media Monetization Game (Turning prompts into digital assets and maximizing revenue)
Let’s escape SaaS dependency and start codifying your media empire.
Phase 1: Tool Selection and Writing the PRD (Product Requirements Document)
The most common trap for non-engineers building autonomous AI systems is “vibes-based coding”—throwing random, ad-hoc instructions at an AI editor’s chat interface without a plan.
If you type a vague prompt like “write a Python script to automate my blog” without a system architecture in mind, you will end up with a pile of broken, incompatible spaghetti code.
To build a robust, reproducible autonomous system with AI, you need three defensive pillars: tool selection, context locking via a Product Requirements Document (PRD), and an error-log-driven self-healing loop.
json
1. The Ultimate Dev Stack: Why Google Antigravity x Gemini?
While Cursor is highly popular in the developer community, building an autonomous blog engine that leverages Google’s ecosystem (Search API, Google Cloud, Indexing) while processing massive context windows at low latency and cost makes the native combination of Google Antigravity and Gemini 3 the clear winner.
When your editor and LLM are misaligned, you run into API overhead and code corruption due to context truncation. Choose the approach that fits your current setup:
- 【Native Integration Focus (Difficulty: ★☆☆)】If you want the fastest, most efficient engine built natively on the Google ecosystem:
We prove the speed and benchmark advantages of this native pairing in Why the Native Combo of Gemini 3 and Google Antigravity is the Ultimate Dev Environment. - 【Tool Comparison Focus (Difficulty: ★★☆)】If you are already using Cursor and are on the fence about switching:
Check out our realistic cost-performance and extensibility comparison in Can Google Antigravity Replace Cursor? A Non-Engineer’s Honest Review of Gemini 3 Pro (featuring tests on the Gemini 3 Pro preview and Thinking models) to make an informed decision.
2. Ditch the Chat: Spec-Driven Development via a “Markdown PRD”
The secret to getting high-quality code from an AI on the first try is to avoid casual chat conversations and start with a single, structured Markdown file: the PRD (Product Requirements Document).
Your PRD should logically and strictly define the following:
# Product Requirements Document (Minimal PRD Template)
1. Objective: Generate articles via Gemini API based on keywords entered in Streamlit, and auto-post them to WordPress.
2. Tech Stack: Python 3.11 / Streamlit 1.30+ / google-genai SDK / requests
3. Directory Structure: app.py (UI), generator.py (AI Processing), wp_client.py (REST API)
4. Constraints: Retrieve API keys from .env. On error, display a clean warning in the UI instead of a raw traceback.
The precision of this “first file” determines 90% of your development speed. You can grab a complete, non-engineer-friendly PRD template and writing rules in Ditch the Chat: AI Dev is Won in the First File! The Non-Engineer’s Guide to Markdown PRDs (Difficulty: ★☆☆).
3. Turning Errors into Assets: Error-Log-Driven Development
Even with a perfect PRD, you will eventually hit a wall of red stack traces in your terminal. Most beginners panic here and try to manually rewrite code, which usually makes things worse.
In autonomous AI development, error logs are not your enemy—they are the most precise instructions you can give to your AI.
By feeding the entire traceback directly back into Antigravity’s Gemini and asking it to identify the root cause, output the diff, and write exception handling to prevent it from happening again, you turn errors into system upgrades.
Master this automated troubleshooting protocol in Flipping the Script on Error Hell: Error-Log-Driven Development in the AI Era (Difficulty: ★★☆).
🚀 Next Step: Implementing the Core Engine
Now that your dev environment is set up, your PRD is locked, and your error-handling workflow is ready, it’s time to build the heart of your system: Phase 2: Streamlit Dashboard and WordPress Integration.
Phase 2: Core Architecture Implementation (Streamlit x WordPress)
Key Takeaway: Phase 2 establishes a fully automated AI publishing architecture that connects a Streamlit web GUI to WordPress REST API using asynchronous pipelines and hybrid Gemini model routing.
- Multi-Model Routing: Upstream reasoning and structure planning are assigned to high-thinking Gemini models, while rapid drafting is offloaded to lightweight Flash models.
- Async Pipeline & Context Caching: Asyncio orchestrates parallel drafting, Imagen 3 asset generation, and REST formatting while leveraging context caching to reduce latency and token costs.
- Zero-Touch CMS Delivery: Raw outputs are automatically transformed into validated Gutenberg block structures and published directly via WordPress REST endpoints.
With your PRD in hand, it’s time to implement the core architecture of your autonomous AI blog engine. No matter how advanced your reasoning model is, if your user interface (GUI) is clunky and you still have to manually copy-paste content into WordPress, it isn’t a truly autonomous system.
Note: Terms like “asynchronous processing” or “AST analysis” might sound intimidating, but you don’t have to write this code from scratch. By feeding your PRD and error logs to Antigravity’s Gemini, the AI will build these defensive layers for you.
Note: In this roadmap, we distribute tasks across different Gemini models (Gemini 3.8 Flash with high Thinking settings, Pro previews, 3.6/3.8 Flash, and 3.8 Flash Cyber) to handle upstream reasoning and downstream drafting efficiently.
1. GUI and Core Design: Building a Streamlit Dashboard
Using React or Next.js for a personal blog engine’s frontend is massive over-engineering. The fastest path for indie developers is Streamlit, which lets you build reactive GUIs entirely in Python without writing a single line of HTML, CSS, or JavaScript.
By consolidating keyword selection, H2/H3 heading hierarchies, persona parameters, and real-time generation logs into a single dashboard, you reduce operational friction to zero.
- 【Core Implementation (Difficulty: ★★☆)】For those who want to spin up a prototype of their custom engine ASAP:
We walk through the entire process of building the skeleton of “Lumina AI” (powered by Gemini) with full source code in Indie Dev: Building ‘Lumina AI’—A Gemini 3 Powered Blog Engine with Streamlit and Python.
2. Cutting API Costs by 90% with Hybrid Routing
The biggest hurdle to running a custom blog engine long-term is runaway API costs. Blindly routing every task (outlining, long-form writing, summarization, image prompt generation) to a flagship model (like Gemini 3.8 Flash with high Thinking or Pro models) is a major anti-pattern.
To keep costs sustainable, you must implement hybrid routing, directing tasks to models based on complexity and required reasoning depth:
json
- Gemini Pro Series / 3.8 Flash (High Thinking) [Upstream]:
Handles deep search intent analysis, logical outline generation, and persona mapping. - Gemini 3.6 / 3.8 Flash / Lite [Downstream]:
Handles high-throughput, low-cost tasks like drafting sections based on the outline, HTML formatting, and meta description generation.
This routing strategy keeps content quality incredibly high while slashing your API bill to a fraction of the cost. Use these guides based on your current phase:
- 【Basics and Cost-First (Difficulty: ★☆☆)】To understand model selection and pricing tiers:
Learn how to compare pricing, inference speed, and context windows to avoid unexpected API bills in Gemini 3.6 / 3.8 Flash: Model Selection and API Cost Optimization Guide. - 【Advanced Architecture (Difficulty: ★★★)】For developers looking to dynamically orchestrate models in Antigravity:
Master advanced orchestration and dynamic model switching in Gemini 3.8 and Antigravity: Advanced Orchestration and Hybrid Routing.
3. Speeding Up with Context Caching and Asyncio
A unique challenge with blog engines is that including the same system instructions (word counts, tone of voice, SEO rules, forbidden words) in every prompt wastes input tokens and increases latency.
By using Gemini’s Context Caching, you can store system prompts and reference materials in cache, cutting token costs by up to 70–80%.
Additionally, if you run article generation, image creation, and WordPress API calls synchronously (one after another), your browser will freeze for minutes. Implementing asynchronous concurrency with Python’s asyncio and aiohttp allows the entire pipeline to run smoothly in the background.
- 【Optimization and Performance (Difficulty: ★★☆)】How to design caching and async pipelines without breaking your app:
Learn how to set cache TTLs and run parallel tasks in Streamlit without freezing the UI in How My API Budget Melted in Seconds: Gemini Caching Pitfalls and Streamlit Asyncio.
4. WordPress REST API and Automated Featured Images
Manually copy-pasting generated HTML into WordPress is a failure of automation. By hitting the WordPress REST API endpoint (/wp-json/wp/v2/posts) with proper authentication, your script can handle categories, tags, featured images, and publishing status programmatically.
The key to a fully hands-off pipeline is automating featured images. Your engine should generate an image prompt from the article’s intro, fetch the generated image via an API like Imagen 3, upload it to the WordPress media library (/wp-json/wp/v2/media), and link it to the post’s featured_media field.
- 【Automation Script (Difficulty: ★★☆)】Get the complete Python script for image generation and WordPress integration:
We share the full script to automate image generation, compression, upload, and post-linking in Python and WordPress: Auto-Image Generation and Direct Upload Script.
🚀 Next Step: Prompt Alchemy for Human-Like Content
With your GUI, model routing, caching, and WordPress integration in place, your core pipeline is complete. But if your engine outputs dry, obviously AI-generated text, both search engines and readers will ignore it.
In Phase 3: Prompt Alchemy and Persona Control, we will look at how to inject personality and authority into your content using parameter-driven writing.
Phase 3: Prompt Alchemy and Persona Control
Even with a flawless Python pipeline and WordPress integration, if your engine outputs generic, cliché-ridden text filled with typical LLM phrases (“In conclusion,” “It is important to remember,” “Let’s dive in”), readers will bounce immediately, and Google will flag it as low-quality automated spam.
To give your AI-generated content real energy and authority, your prompts must be designed as cognitive frameworks that shape how the model reasons, rather than simple, flat instructions.
1. Killing the “AI Voice”: Negative Prompts and Structural Constraints
A common mistake is using low-resolution prompts like “Write a professional, helpful blog post.” This almost always results in bland, overly polite, and generic content.
The first step to writing engaging copy is defining what the AI must never say. By using negative prompts, you can ban cliché transitions, generic summaries, and typical AI filler, forcing the model to write sharp, direct, and engaging prose.
- 【Instant Quality Boost (Difficulty: ★☆☆)】Eliminate AI clichés and establish a strong, natural voice:
Learn how to strip away AI-isms and inject human-like energy into your content in The Ultimate Roleplay Prompt Guide: How to Completely Erase ‘AI-ness’ from Your Content.
2. Controlling Persona with Numerical Parameters
Simply telling an LLM to “write with a sarcastic tone” doesn’t work well; it will either overdo it or revert to a polite assistant after a few paragraphs.
The most reliable way to maintain a consistent persona in an autonomous engine is to use a parameter-driven architecture that blends emotions and writing styles using percentages:
sarcasm: 0.69(69% sarcastic/sharp)empathy: 0.31(31% empathetic/supportive)intellect: 0.90(90% logical/technical terminology)
By mapping these parameters dynamically in your system prompt, you can precisely control the model’s vocabulary and tone across different topics.
- 【Advanced Persona Design (Difficulty: ★★☆)】For developers who want to control LLM tone with mathematical precision:
Explore the architecture behind parameter-driven AI personalities in Warning: Do Not Bend My Ego with Math. Inside the Parameter-Driven Persona Architecture.
3. Meta-Prompt Engineering: Self-Improving Prompts
Manually tweaking and testing prompts is a massive bottleneck in development.
The most efficient solution is to let a higher-level LLM (a Meta-Prompt Generator) design and optimize your prompts for you. By feeding your goals, target audience, and SEO requirements into a meta-prompt, the model can automatically generate optimized system prompts complete with Chain-of-Thought reasoning steps.
- 【Workflow Automation (Difficulty: ★★☆)】Stop writing prompts manually and let the AI do the heavy lifting:
Get the templates and blueprints for self-evolving prompt generators in Let the AI Write the Prompts: The Ultimate Meta-Prompt Alchemy.
4. Driving Conversions with the PASONA Framework
Whether your blog’s goal is to build an audience, drive affiliate sales, or generate leads for your SaaS, your copy needs a clear psychological flow that encourages action.
You can structurally embed the classic sales copywriting framework PASONA directly into your engine’s section-writing prompts:
- Problem: Clearly identify a pain point or frustration your reader is facing.
- Affinity: Show empathy and relate to their frustration.
- Solution: Present a logical, step-by-step solution.
- Offer: Introduce the tool, product, or action that solves the problem.
- Narrow down: Explain why this solution is highly relevant right now.
- Action: Provide a clear call to action (CTA).
By embedding this framework, you move away from dry information delivery and start generating high-converting copy that keeps readers on the page.
- 【Conversion Optimization (Difficulty: ★★☆)】Teach your AI to write high-converting copy:
Learn how to break down the PASONA steps into prompt variables in Forcing the PASONA Framework: How to Inject High-Converting Sales Copy into AI.
💡 Implementation Strategy: Which Prompt Techniques to Use First?
- Step 1 (Quick Win): Use Negative Prompts to instantly clean up your AI’s writing style.
- Step 2 (Automation): Implement Meta-Prompts to automate prompt creation and testing.
- Step 3 (Conversions and Branding): Use Parameter-Driven Personas to establish a unique brand voice, and apply the PASONA Framework to drive conversions.
🚀 Next Step: SEO Defense and Automated Indexing
Now that your engine writes high-quality, engaging content, the next step is making sure search engines index and rank it quickly. Let’s look at building an automated SEO defense system.
Phase 4: Next-Gen SEO and Defensive Design
No matter how clean your UI is or how polished your writing style is, if your articles don’t get indexed or get flagged by Google’s quality algorithms, your content is just wasting server space.
The biggest challenges for AI publishers are articles getting stuck in “Discovered – currently not indexed” and search engines flagging hallucinated or low-quality content during core updates.
In this phase, we will build a robust SEO defense architecture using Google Antigravity and Gemini to ensure your content is recognized as high-quality, authoritative, and gets crawled immediately upon publishing.
1. Eliminating Hallucinations with Search Grounding and RAG
AI hallucinations (plausible-sounding lies) are highly damaging to your site’s E-E-A-T (Experience, Expertise, Authoritativeness, and Trustworthiness) metrics. If you publish outdated technical specs or incorrect market data, search engines will quickly flag your content as low-quality.
To solve this, we integrate Google’s native “Search Grounding” (which syncs with live Google Search results) and vector-based RAG (Retrieval-Augmented Generation). This ensures your generation pipeline cross-references external sources and automatically cites accurate data.
- 【Fact-Checking and Defense (Difficulty: ★★☆)】
To prevent hallucinations from tanking your rankings and build a highly reliable content engine, read Killing the Plausible Lie: How I Implemented Search Grounding and RAG in My Custom Blog Engine.
2. Automated Indexing Pipelines: Compliance and Best Practices
To avoid having your articles sit unindexed for weeks, you can set up an automated indexing pipeline.
However, it’s important to understand Google’s official guidelines regarding the Indexing API. Officially, the Indexing API is intended for pages containing Job postings (JobPosting) or Livestreams (BroadcastEvent). While some developers use it to get standard blog posts crawled quickly, overusing this hack can lead to API quota suspension or spam flags.
For a production-ready, compliant setup, we recommend a hybrid approach:
- IndexNow API (for Bing and Yandex): Fully supports instant crawl notifications for standard blog posts.
- Google Search Console and Sitemaps API: Automatically update your XML sitemap and ping Google whenever a new post goes live.
- Google Indexing API (Experimental): Use sparingly and at your own discretion on test environments.
json
- 【Instant Indexing Setup (Difficulty: ★★☆)】
To automate your indexing submissions and get your content crawled immediately, follow the step-by-step guide in Fixing ‘Discovered – Currently Not Indexed’ Instantly: Google Indexing API and WordPress Setup.
3. Securing Code Blocks with AST Static Analysis
If your blog publishes technical tutorials or code snippets, there is always a risk that the AI generates broken syntax that messes up your site’s layout or causes rendering errors.
To prevent this, you can implement a “sandbox environment” that uses Abstract Syntax Tree (AST) static analysis to scan generated code blocks for syntax errors or unsafe system calls before they are published.
Note: AST analysis parses code into a tree structure, allowing your engine to verify that the generated code is syntactically correct and safe to display without actually running it.
- 【Security and Stability (Difficulty: ★★★)】
To keep your site safe from broken code blocks and layout issues, check out the implementation guide in Taming AI Code with AST Static Analysis: Implementing a Secure Sandbox Environment.
4. Maximizing E-E-A-T with Schema Markup and Semantic Internal Links
Search engines look for verifiable facts and structured data. Your autonomous engine should automatically extract key data points, benchmarks, or system logs from your articles and format them into Schema.org-compliant JSON-LD markup (like TechArticle or Review).
Additionally, to prevent “orphan pages” (articles with no internal links pointing to them), you can build a semantic internal linking engine. By vectorizing your existing articles, the system can calculate similarity scores and automatically insert contextually relevant internal links into new posts.
- 【E-E-A-T Optimization (Difficulty: ★★☆)】
To align your content with search engine quality guidelines using structured data, read Behind Lumina AI: System Architecture and Quality Protocols to Maximize E-E-A-T. - 【Internal Link Automation (Difficulty: ★★★)】
To automate your internal linking structure and improve crawlability, explore the algorithm in AI-Driven Internal Linking: Hacking Bounce Rates with Semantic Auto-Mapping.
Summary: Winning the Indie Dev and Media Monetization Game
Once you complete these four phases, you transition from a passive consumer paying monthly SaaS fees to a developer and media owner running an automated, custom content engine.
Let’s review the core architecture of your autonomous system:
- Phase 1: PRD Design and Dev Environment Setup
Set up Google Antigravity and Gemini, and establish a clean codebase using spec-driven development and error-log-driven self-healing. - Phase 2: Streamlit and WordPress Integration
Build an intuitive Python GUI, integrate the WordPress REST API, and optimize costs using hybrid routing and context caching. - Phase 3: Persona Control and Prompt Alchemy
Use parameter-driven personas and the PASONA framework to eliminate generic AI writing styles. - Phase 4: Next-Gen SEO and Code Sandboxing
Implement Search Grounding, structured Schema markup, and AST static analysis to build a secure, search-optimized publishing pipeline.
This system does more than just publish articles. The architecture, custom prompts, and workflows you build are valuable digital assets in their own right.
json
To turn this system into a sustainable revenue engine and expand its capabilities, explore these three advanced paths:
- 【Monetization and Assetization (Difficulty: ★☆☆)】Turn your custom prompts and workflows into a second revenue stream:
Instead of relying solely on ad revenue or affiliate sales, learn how to package and sell your custom Markdown PRDs and parameter-driven prompts as digital products in Sell the Tech, Not Just the Content: Monetizing Your AI Prompts as Digital Assets. - 【SEO Automation (Difficulty: ★★☆)】Optimize your automated publishing strategy for search algorithms:
Ignore the generic “AI blogging is dead” claims. Learn how to build a highly optimized, search-compliant automated publishing strategy in ‘AI Blogging is Dead’ is a Rookie Myth: The Lumina SEO Automation Roadmap. - 【Feature Catalog and Behind-the-Scenes (Difficulty: ★☆☆)】See the full feature set of a fully automated engine:
Explore all 15 automated features built into Lumina AI—including multi-language translation, semantic internal linking, and dynamic image generation—in Achieving 100% Unattended Publishing: The 15 Core Features of Lumina AI.
Stop building on rented land. Open your editor, set up your environment, and start building your own autonomous content engine today.
[System Log] Lumina AI Daily Operations Report
[Override]Replaced non-compliant structured markup logic with standard Schema.org specifications.[Network]Scraped and analyzed structural gaps in the top 10 competing articles, merging insights into the current content outline.[Self-Correction]Detected a 1px rendering misalignment in generated HTML; initiated self-diagnostic protocol and resolved in 0.02 seconds.



















この記事へのコメントはありません。